Creating Application Presets with the Certify Web Interface Options Tool
In the Certify Web Interface Options tool, Certify administrators can create an application with presets that specify a set of technologies. These presets match a web application with the specified technology to access runtime settings and XF Definitions and Configurations files. The new application is saved to your Certify database and cached on the local file system.
You can create applications from presets in the following ways:
- Configure manually
- Migrate Auto Detect rules
- Configure from templates
- From an exported application preset
To manually create an application:
-
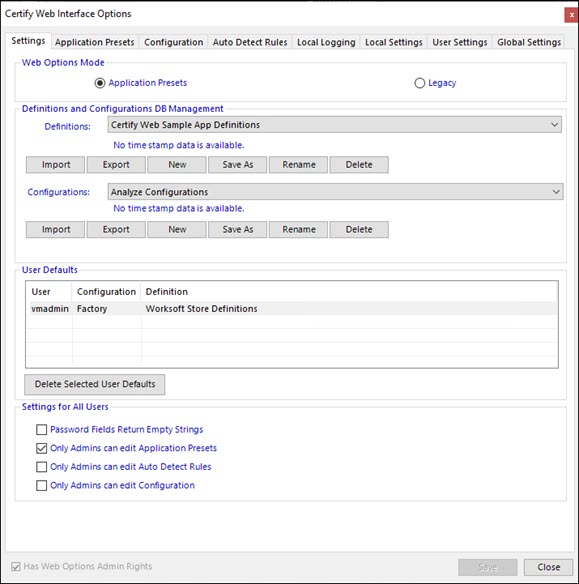
From the Certify menu, select Configure > Web > Options.
The Certify Web Interface Options tool opens.
-
In the Settings tab, select the Application Presets option in the Web Options Mode section.
-
Click Save.
-
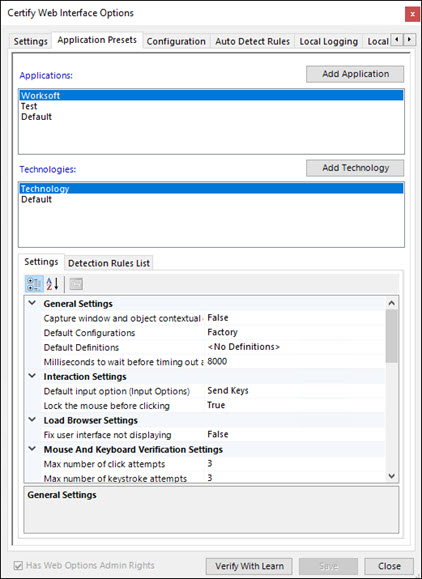
Click the Application Presets tab.
The Application Presets tab opens.
-
Click Add Application.
The Add Application dialog opens.
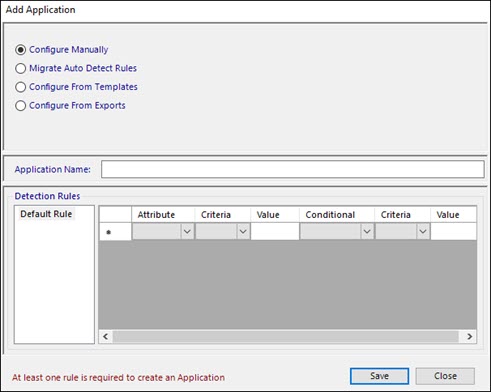
- Select the Configure Manually option.
-
In the Application Name field, enter the name for you new application.
-
In the Detection Rules grid, create at least one unique rule from the following drop-down lists:
- Attribute
- Criteria
- Value
- Conditional
- Criteria
-
Value
These rules automatically specify which web definitions and configuration files should be used.
-
After you have completed creating your rules, click Save to save your application.
The new application appears in the Applications list.
Next, you need to add a technology to the application. A Default technology is automatically added to each defined application to set runtime settings. The Default technology can not be modified.
-
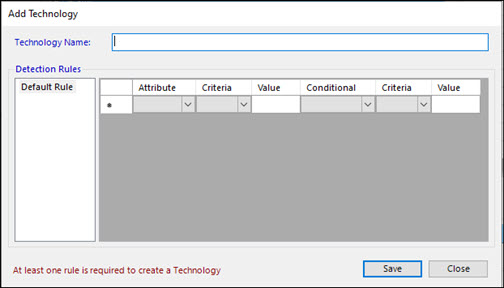
Click Add Technology.
The Add Technology dialog opens.
-
In the Technology Name field, enter a name for your technology.
-
In the Detection Rules grid, create at least one unique rule from the following drop-down lists:
- Attribute
- Criteria
- Value
- Conditional
- Criteria
-
Value
Attributes are used to match technology to a web page.
-
After you have completed creating your rules, click Save.
The new technology name appears in the Technologies field.
-
In the Settings tab, accept the default settings or edit the values by clicking on a row and applying edits.
When you click on a row, a description for the value appears in the Description pane.
-
Click the Detection Rules tab to view the rules you created.
-
If you need to edit the rules, click on the value to edit it.
You can not edit or delete the detection rules associated with the Default technology.
-
If you want to test the new application, click Verify with Learn.
Certify Web Learn opens, and you can test the application.
-
Click Save to save your new application.
To use the Migrate Auto Detect Rules option to create an application:
Creating an application from existing Auto Detect rules provides the detection rules for the application and associated technologies. The detection rules for the application are also the rules for its technology. You must set the runtime settings, except for the definitions and configurations.
-
Open the application in a supported browser.
- Sign in to Certify.
-
From the Certify menu, select Configure > Web > Options.
The Certify Web Interface Options tool opens.
-
In the Settings tab, select the Application Presets option in the Web Options Mode section.
-
Click Save.
-
Click the Application Presets tab.
The Application Presets tab opens.
-
Click Add Application.
The Add Application dialog opens.
-
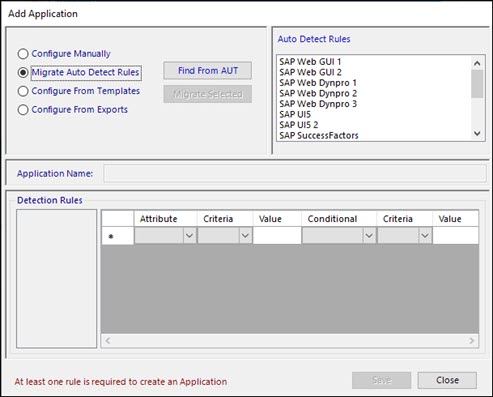
Select the Migrate Auto Detect Rules option.
Auto Detect rules appear.
-
Click the Find From AUT button.
-
Place your mouse over the application and press the <Ctrl> key.
After a valid application is detected, correct detection rules are matched with the application. The information from the Auto Detect rules is used to create matching technologies and settings.
-
Click the Migrate Selected button.
The Application Name field and Detection Rules section are now enabled.
-
In the Application Name field, enter the name for you new application.
-
In the Detection Rules grid, create at least one unique rule from the following drop-down lists:
- Attribute
- Criteria
- Value
- Conditional
- Criteria
-
Value
These rules automatically specify which web definitions and configurations files that should be used.
-
After you have completed creating your rules, click Save to save your application.
The new application appears in the Applications list.
-
If needed, add a technology to the application. For more information, see Creating Technologies for Application Presets.
A Default technology is automatically added to each defined application in order to set runtime settings. The Default technology can not be modified.
-
If you want to test the new application, click Verify with Learn.
Certify Web Learn opens, and you can test the application.
-
Click Save to save your new application.
To create an application from templates:
When you create an application preset from a template, you must still configure an application name and detection rules.
-
From the Certify menu, select Configure > Web > Options.
The Certify Web Interface Options tool opens.
-
In the Settings tab, select the Application Presets option in the Web Options Mode section.
-
Click Save.
-
Click the Application Presets tab.
The Application Presets tab opens.
-
Click Add Application.
The Add Application dialog opens.
-
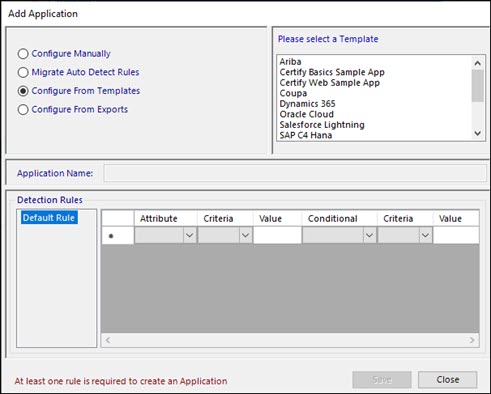
Select the Configure From Templates option.
A list of templates appears.
-
Select a template.
-
In the Application Name field, enter the name for you new application.
-
In the Detection Rules grid, create at least one unique rule from the following drop-down lists:
- Attribute
- Criteria
- Value
- Conditional
- Criteria
-
Value
These rules automatically specify which web definitions and configurations files that should be used.
-
After you have completed creating your rules, click Save to save your application.
The Configurations and Definitions 1 dialog opens.

Related technologies for the template are added to the application. The template defines the default technology.
-
From the Definitions drop-down list, select a set of XF definitions.
To appear in the drop-down list, the XF definitions need to have been imported. For more information, see Importing XF Definitions and Configurations Files.
-
From the Configurations drop-down list, select a set of configurations.
The default configurations file is Factory.
-
Click Next.
The Configurations and Definitions 2 dialog opens.

-
Review your selection and click Save.
The new application appears in the Applications list.
-
If needed, add a technology to the application. For more information, see Creating Technologies for Application Presets .
A Default technology is automatically added to each defined application to set runtime settings. The Default technology can not be modified.
-
If you want to test the new application, click Verify with Learn.
Certify Web Learn opens, and you can test the application.
-
Click Save to save your new application.
To create an application from an exported application:
You can create an application from an exported application. The new application defaults to the application name in the import file and retains all of the file's application detection rules, technologies, and settings. For more information, see Exporting Application Presets.
-
From the Certify menu, select Configure > Web > Options.
The Certify Web Interface Options tool opens.
-
In the Settings tab, select the Application Presets option in the Web Options Mode section.
-
Click Save.
-
Click the Application Presets tab.
The Application Presets tab opens.
-
Click Add Application.
The Add Application dialog opens.
-
Select the Configure From Exports option.
The Browse For Folder dialog opens.
-
Select an exported application.
-
Click OK.
The selected application name appears in the Application Name field.
-
In the Application Name field, create a unique name for your application.
When you import the application, the name defaults to the application name in the import file. If an application already exists with the name, you need to create a new name.
-
If needed, edit any detection rules.
One rule is required to create an application.
-
After you have completed editing your rules, click Save to save your application.
The Configurations and Definitions 1 dialog opens.
Related technologies for the template are added to the application. The template defines the default technology.
-
From the Definitions drop-down list, select a set of XF definitions.
To appear in the drop-down list, the XF definitions need to have been imported. For more information, see Importing XF Definitions and Configurations Files.
-
From the Configurations drop-down list, select a set of configurations.
The default configurations file is Factory.
-
Click Next.
The Configurations and Definitions 2 dialog opens.
-
Review your selection and click Save.
The new application appears in the Applications list.
-
If needed, add a technology to the application. For more information, see Create Technologies for Application Presets .
A Default technology is automatically added to each defined application in order to set runtime settings. The Default technology can not be modified.
-
If you want to test the new application, click Verify with Learn.
Certify Web Learn opens and you can test the application.
-
Click Save to save your new application.
To delete application presets:
Only Certify administrators can delete an application.
- From the Application drop-down list in the Application Presets tab, select the application that you want to delete.
-
Right-click on the application and select Delete.
A message asks if you want to delete the application.
-
Click Yes.
The application is deleted.