Create a Results Query in Certify Results API
With the Certify Results API, you can create a results query to retrieve Certify results, processes, and attributes.
Before you begin this process, you must have completed the following:
-
Registered your Certify databases in the Worksoft Portal.
For more information, see Adding Certify Databases to the Worksoft Portal.
- Created a token in Certify Results API to access the API and to create results queries. For more information, see Generating a Token in Certify Results API.
To create a results query in Certify Results API:
-
Open Certify Results API on your Certify Services server with the following URL address:
http://<servername>/CertifyResultsAPI
-
Using your Worksoft Portal credentials, enter your credentials and click Login.
Certify Results API opens.
-
Click the Main Menu
 button and select Query.
The Create/Modify Query tab opens.

- In the Query Name field, enter a name for your query.
- In the Project Name field, enter a name of the project you want to query.
-
In the Results Folder Name field, enter the project name and results folder you want to query.
Examples:
<Project Name> - includes all result folders in the under <Project>
<Project Name>/<Parent Folder Name>/<Child Folder Name> - includes all <Child Folder> and its sub folders
-
If needed, click the Calendar
 icon to select the dates in the State Date and End Date fields.
 - If needed, select the number of days for the query.
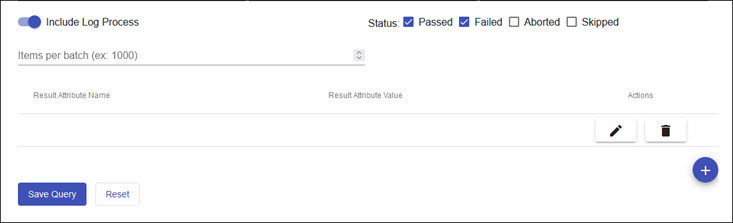
- If you want to select a log process, select the Include Log Process option.
- Select the Status options that you want to include in your query:
- Passed
- Failed
- Aborted
- Skipped
-
If you want to use result attributes to filter your results, click the Add Attribute
 button.
If you do not want to add attributes, go to Step 15.
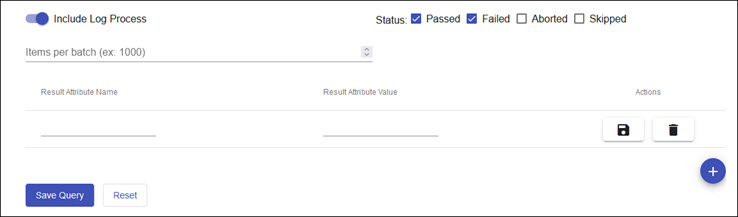
A new result attribute row appears.
-
Click the Edit
 button next to the new entry line to make it editable.
Add your attribute name and value in the appropriate fields.
-
Click the Save
 button to save your attribute.
 -
Repeat this process to add additional attributes.
-
Click Save Query.
A message appears saying that your query was saved.
After you have saved your query, a query ID is assigned to the query. You need this ID when you retrieve Certify results with Certify Results API Swagger. For more information, see Retrieving Certify Results from a Saved Query ID with Certify Results API Swagger.
Managing Queries
To manage your queries, click the Manage Queries tab.
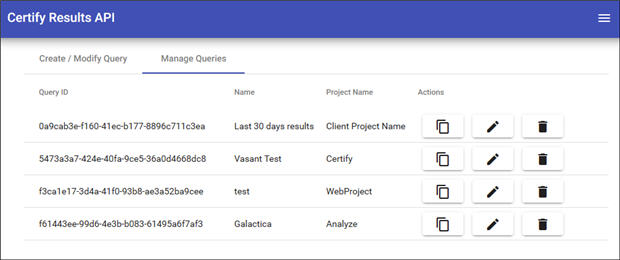
To copy a query, click the Copy Token to Clipboard  button.
To edit a query, click the Edit  button.
To delete a query, click the Delete  button.