Adding Certify Databases to the Worksoft Portal
You must add Worksoft Certify databases to the Worksoft Portal. Worksoft RPA Orchestrator requires two different Certify databases:
- RPA development database - testing database
- RPA published database - production database
Database Connection Configuration Options
When you add your Certify databases, you must select how you want to set up your database security configuration. You need to be a superuser to configure both connections:
- User Based Configuration
- Managed Service Identity Configuration
To add a Certify database with a user-based configuration connection:
-
From the Worksoft Portal menu, select Settings > Certify Databases.
The Certify Databases page opens.
-
Click the Add New Database button.
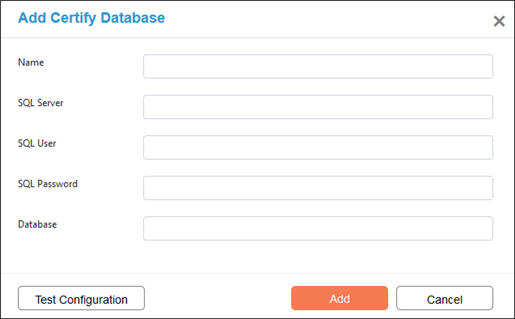
The Add Certify Database dialog opens.

-
Select the User Based Configuration option.
-
In the Name field, enter a unique name for your Certify database that will be your database alias.
- In the SQL Server field, enter the server name.
- In the Database field, enter the database name.
-
If you want to use Windows authentication, select the Use Trusted Connection (Windows) option.
For more information about configuring Windows authentication, see the Worksoft Certify Installation Guide.
-
If you want to use SQL Server authentication, enter the SQL Server user name and password in the respective fields.
-
Select the Trust Server Certificate option.
-
Click Test Configuration to test your database connection.
A message opens stating if the connection was successful or failed. If the test fails, troubleshoot the database connection.
- Click OK to close the message.
-
Click Add to save your database.
The new database appears in the Certify Databases page.
To add a Certify database with a Managed Service Identity configuration connection:
-
From the Worksoft Portal menu, select Settings > Certify Databases.
The Certify Databases page opens.
-
Click the Add New Database button.
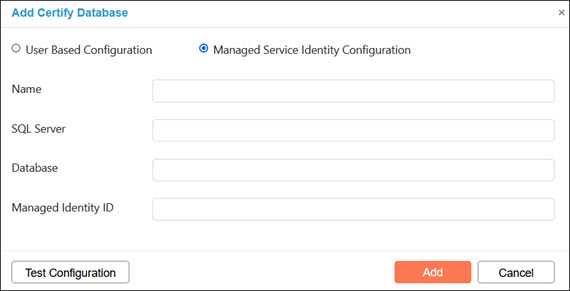
The Add Certify Database dialog opens.

-
Select the Managed Service Identity Configuration option.
-
In the Name field, enter a unique name for your Certify database that will be your database alias.
- In the SQL Server field, enter the server name.
- In the Database field, enter the database name.
-
In the Managed Identity ID field, enter the ID.
-
Click Test Configuration to test your database connection.
A message opens stating if the connection was successful or failed. If the test fails, troubleshoot the database connection.
- Click OK to close the message.
-
Click Add to save your database.
The new database appears in the Certify Databases page.