Managing Email Servers for the Email Interface
Certify administrators can add, edit, and delete email servers for the Email interface in the Email Configuration tool. They can configure servers that use basic authentication or OAuth 2.0 authentication for Microsoft 365 email accounts. Adding servers simplifies and reduces the steps needed when creating an Email interface process.
Users without administrator rights can only view configuration and accounts.
To add a new email server:
-
From the Certify menu, select Configure > Interfaces > Email.
The Email Configuration tool opens.
-
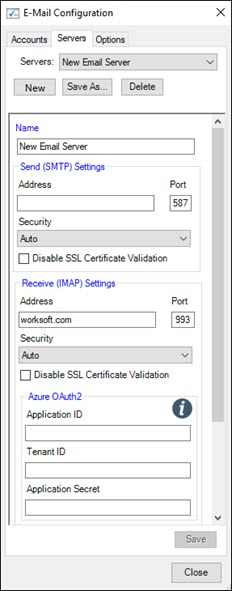
Click the Servers tab.
The Servers tab opens.
-
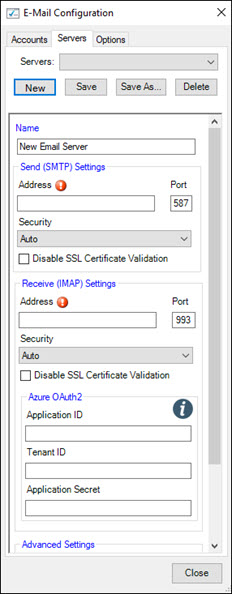
Click New to add a new email server.
The New Server screen opens.
-
In the Name field, enter a unique server name.
-
In the Send (SMTP) Settings Address field, enter an IMAP or SMTP address to use with the Send action.
If you have any questions, ask your IT administrator.
-
In the Security field, keep the Auto default value and do not select the Disable SSL Certificate Validation option unless your IT administrator makes an exception.
-
In the Receive IMAP Settings Address field, enter an IMAP or SMTP address to use with the Receive action.
If you have any questions, ask your IT administrator.
-
In the Security field, keep the Auto default value and do not select the Disable SSL Certificate Validation option unless your IT administrator makes an exception.
-
If using Microsoft 365 email addresses that require OAuth 2.0 authentication, enter the Azure application ID and tenant ID in the Azure OAuth2 section.
For more information, contact your IT administrator and read Configuring Microsoft 365 to Enable OAuth for the Email Interface.
-
If needed, scroll down to the Advanced Settings section to specify servers you would accept connections in cases where the SSL certificate name and hostname do not match.
-
In the Hostname Whitelist field, specify host servers in a comma-delimited list. This value is typically left blank.
-
Click Save to save the server.
To copy an email server:
-
In the Email Configuration tool, click the Servers tab.
The Servers tab opens.
-
From the Servers drop-down list, select the server you want to copy.
-
Click Save As.
The Save As dialog opens.
-
In the Server Name field, enter a unique server name.
-
Click OK.
The new server is saved.