Enabling Application Presets to Utilize Visual Model
When you create application presets, you can configure them to utilize the Visual Model option. The Visual Model recognizes a web page by seeing visual elements, such as borders and text. Using the Visual Model option will help you build and maintain Certify processes, as it reduces the need for customized extensibility frameworks in most Web applications.
With the Visual Model option, you can use the following text anchors to identify how objects are being laid out in the window:
- TextAnchorLeft
- TextAnchorRight
- TextAnchorAbove
- TextAnchorBelow
These text anchors are delivered as Visual Model-based properties, and they can be added to object attributes using configuration or while editing an object. For more information, see Create a New Learn Configuration and Edit an Object in Certify Web Learn.
To use this feature, you must enable the Visual Model Enabled option in the Certify Web Interface Options tool.
To enable Visual Model in Application Presets mode:
- Sign in to Certify.
-
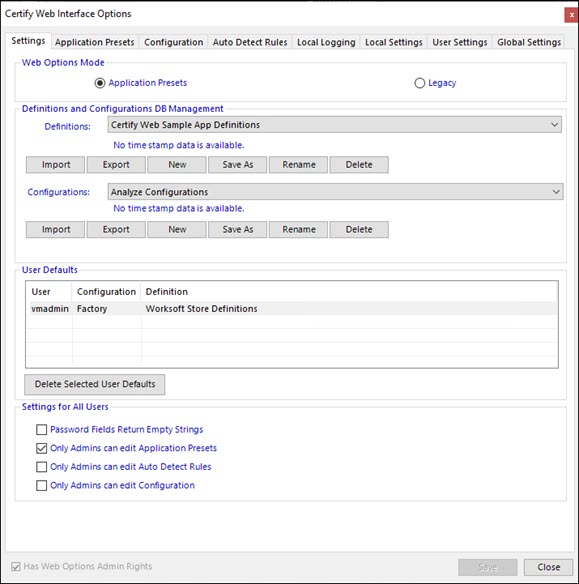
From the Certify menu, select Configure > Web > Options.
The Certify Web Interface Options tool opens.
-
In the Settings tab, select the Application Presets option in the Web Options Mode section.
-
Click Save.
-
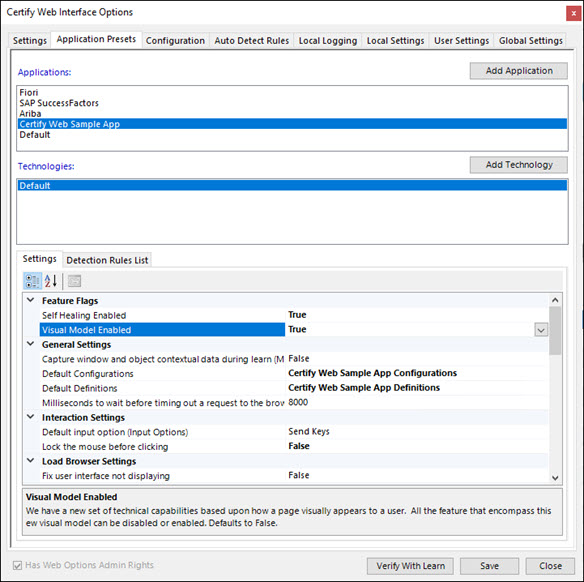
Click the Application Presets tab.
The Application Presets tab opens.
-
In the Settings tab, select True from the Visual Model Enabled drop-down list in the Feature Flags section.
-
Click Save.
To enable Visual Model in Legacy Mode:
If you are using Legacy mode, you must enable the feature flag for the self-heal option by updating your configuration file–Worksoft.Interfaces.HTML.dll.config. The configuration file is user-specific on each machine.
To navigate to the configuration file, enter %appdata%\worksoft\HTML in the File Explorer.
-
Open the Worksoft.Interfaces.HTML.dll.config file in Notepad.
-
Enter the following information in the configuration file:
<add key="VisualModelEnabled" value="True" />
-
Save the updated configuration file.