Adding Steps with LiveTouch in Business Capture
With the Certify LiveTouch™ feature in Business Capture, you can learn application objects while adding steps to your captured process. As you select an object, a step is added to the step list.
To add steps with LiveTouch to an existing Capture:
-
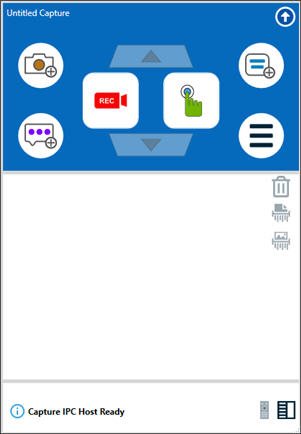
Click the Business Capture
 icon on your desktop.
Business Capture opens.
-
Click the Main Menu
 button and select Load from Local File.
The Select Capture File to Load page opens.
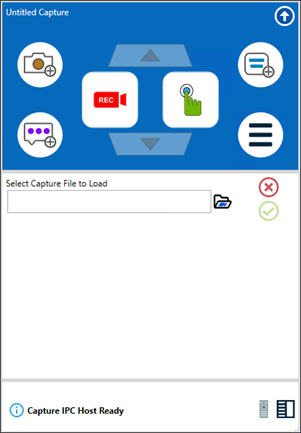
- Click the Browse
 button to browse to the Capture file you want to open.
 - Select the file.
- Click Open.
-
Click Save
 .
.Your existing Capture opens.
-
Open the application where you want to capture the steps of the process.
-
When you are ready to insert a step with LiveTouch, click the LiveTouch
 button.
-
Place your mouse over the object you want to capture in the application.
A red highlight appears around the object in the application.
-
Click on the highlighted object to add an object and a step to your process.
The step is added to the end of your captured process.
If you need to undo an action, press <Ctrl> <Z>.
-
After you have completed your object selection, click the LiveTouchbutton to end LiveTouch mode.
The steps you added with LiveTouch appear at the end of your captured process.
-
To move the new step, drag the step to where you want to place it in the process.
- Click the Main Menu button and select one of the following:
- Save to Local File - Save Capture as an XML file.
-
Save to Process Intelligence - For more information about saving to Worksoft Process Intelligence, see Saving a Captured Process to Worksoft Process Intelligence.
The Save to File page opens.
- In the Capture Name field, enter a name for your Capture file.
- (Optional) In the Description field, enter a description.
-
Click Save.
The Save As dialog opens.
-
Browse to the folder in which you want to save your Capture file.
-
Click Save.