Calibrating the Screen Resolution of the Mainframe LT Emulator
To enable proper identification of fields when using Certify LiveTouch for Mainframe, you need to calibrate the screen resolution of the emulator window.
Typically, the calibration procedure only needs to be performed once. However, if the screen resolution or window size changes, then the calibration procedure needs to be repeated.
Before you begin the calibration, verify that the correct emulator is listed as the default name in the EmulatorConfiguration.xml file located in the following directory:
C:\Program Files (x86)\Worksoft\Certify\Interface Client\Worksoft\wsTest\Mainframe-LT\
Example:
<EMULATORS>
<DEFAULT name="BlueZone" />
To calibrate the screen resolution of the Mainframe LT Emulator:
-
Open your emulator with a maximized window and connect to the remote Mainframe system.
Worksoft recommends always running the emulator with a maximized window to avoid issues with changing the window's size.
- Open Certify.
-
From the Certify menu, select Configure > Interfaces > Mainframe-LT.
The Screen Calibration tool opens.
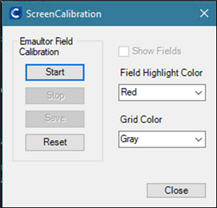
-
From the Field Highlight Color drop-down list, select a highlight color.
-
From the Grid Color drop-down list, select a grid color.
-
Click Start to begin the calibration process.
-
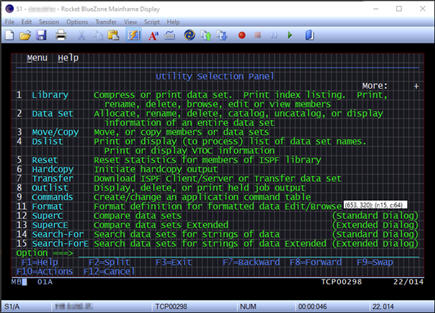
Using the mouse or arrow keys, move and resize the grid overlay over the emulator window so that each character occupies a single grid cell.

The arrow keys adjust the grid with finer control than the mouse. For more information, see Using the Arrow Keys.
- Note: The Operator Information Area (OIA) that appears at the bottom of the window should not be included in the grid. Different emulators show the OIA different ways, and it can toggle the view on and off.
-
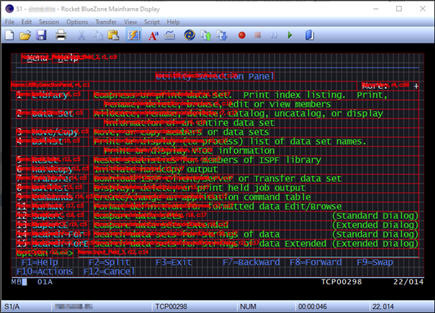
After you have adjusted the grid size and position, select the Show Fields option in the Screen Calibration tool.
In the emulator, detected fields are outlined.
Example: Grid overlay without fields
Example: Grid overlay with field highlights
-
Verify that the outlines are correct and make any necessary adjustments.
-
In the Screen Calibration tool, click Stop.
-
In the Screen Calibration tool, click Save to save the calibration settings.
The settings are saved to the Mainframe-LT app.config file.
Certify LiveTouch is now ready to be used for Mainframe-LT interface.
Using the Arrow Keys
The arrow keys help you create a grid overlay for screen calibration. Here is how you can use the arrow keys:
- Press and release the arrow keys to move the grid a single pixel at a time.
- Press and hold the arrow keys to move the grid in larger increments. The longer the key is pressed, the more the grid will move.
- Press and hold the <Shift> key to adjust the grid size.
- Use the <Left> arrow key to shrink the width of the grid, and use the <Right> arrow key to expand the width of the grid.
- Use the <Up> arrow key to shrink the height of the grid, and use the <Down> key to expand the height of the grid.