Mapping a Tag Rule to a Certify Class
In the Configuration tab of the Certify Web Interface Options tool, you can map a new tag to a Certify class or edit an existing tag. Also, you can set rules to determine if an object should be mapped to a class name. If no rules are set for an object, then the object is mapped to the specified Certify class.
When learning an application, the correct Certify class is assigned to each learned element according to its tag name and rules. If objects do not have classes mapped to them, they still appear in the Learned Objects tree of the Learn utility, but they are not imported into Certify.
To map a tag to a Certify class:
-
From the Certify menu, select Configure > Web > Options.
The Certify Web Interface Options tool opens.
- In the Certify Web Interface Options tool, click the Configuration tab.
The Configuration Tab opens.

-
From the Configuration File drop-down list, select a configuration file.
Remember that you cannot edit the default Factory configuration file.
-
From the Configuration Rules pane, select a tag rule.
The right pane displays the Class Mapping tab where you can map a tag rule.
-
In the Class Mapping tab, click the New Class Mapping Rule
 button or right-click in the pane and select New.
To edit an existing Caption page rule, right-click on a caption rule and select Edit or click the Edit Selected Class Mapping Rule.
The New Rule or the Edit Rule dialog opens.
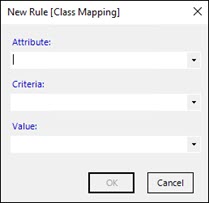
- From the Attribute drop-down list, select one of the following attributes:
- ALT
- CLASSNAME
- ID
- INNERHTML
- INNERTEXT
- NAME
- OUTERHTML
- OUTERTEXT
- TITLE
- From the Criteria drop-down list, select one of the following criteria:
- Is Equal To
- Starts With
- Contains
- Ends With
- Is Not Equal To
- Does Not Start With
- Does Not End With
- From the Value drop-down list, enter a value or select one of the following values:
- {ANY}
- {EMPTY}
-
Click OK.
The new rule or edited rule appears in the Class Mapping tab.
-
Click Save.