Creating Tenants in the Worksoft Portal
The Tenant Administration option is for large companies who want to add multi-tenant support. Each tenant has isolated data for each of the products, and it is able to leverage the SMTP settings or configure a specific one.
When the Worksoft Portal is installed, a single primary default tenant named Master is created, and this tenant is responsible for configuring the Worksoft Portal's configuration. From the primary tenant space, an administrator can create other tenant spaces if they want to partition data within their organization.
The administrator manages all tenants within the Portal and assigns users to each tenant. These users will be managed by administrators in that tenant space. Superusers are able to add, edit, or disable tenants.
To add tenants to the Worksoft Portal:
-
Sign in to the Worksoft Portal as an administrator.
-
From the Worksoft Portal menu, select Portal Configuration> Tenant Administration.
The Tenant Administration page opens.
-
Click Add Tenant.
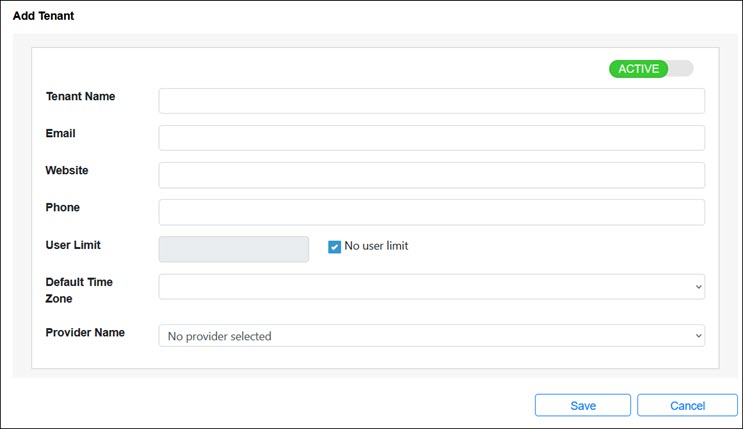
The Add Tenant page opens.
-
To create an active tenant, verify that Active is selected.
To deactivate a tenant, select Inactive.
- Enter the following information in the related fields:
- Tenant name
- Email address - Tenant administrator
- Website
- Phone - Tenant administrator
-
If you want to limit the number of users in this tenant, cancel the No user limit option and enter the number of users in the User Limit field.
If you do not want to limit the number of users, leave this option selected.
- From the Time Zone drop-down list, select your preferred time zone for the user.
- From the Provider Name drop-down list, select a provider.
-
Click Save to save the new tenant.
The new tenant appears in the Tenant Administration page.
Note: When creating additional tenants, an email account can be associated with more than one tenant space.