Editing Multiple Processes in a Suite
You can change the execution configuration of multiple processes in a suite simultaneously.
These procedure assumes that you have already created a suite. For more information about creating a suite, see Creating CTM Suites.
To edit multiple processes in a suite:
-
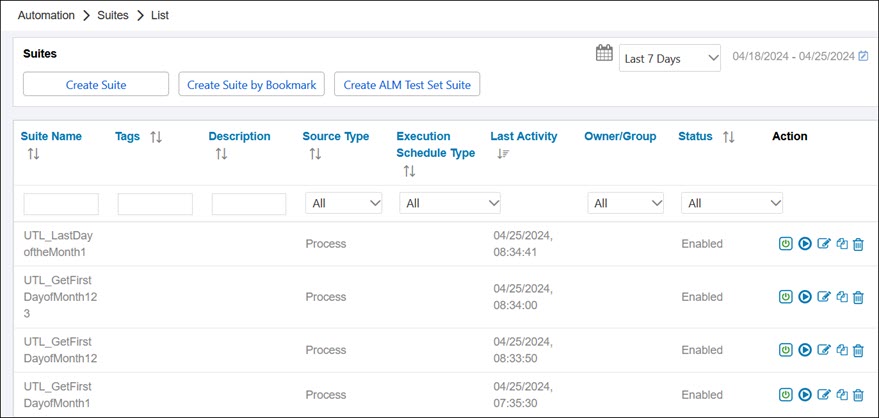
From the Continuous Testing Manager menu, click Suites.
The Suites page opens.
-
Click the Edit Suite
 button next to the suite you want to edit.
The selected suite opens.
-
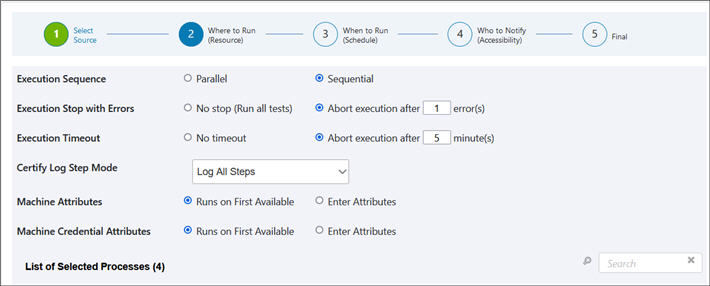
On the Progress Bar, click 2 Where to Run (Resource).
The Execution Specification page opens.
-
Scroll down the page to the List of Selected Processes table.
-
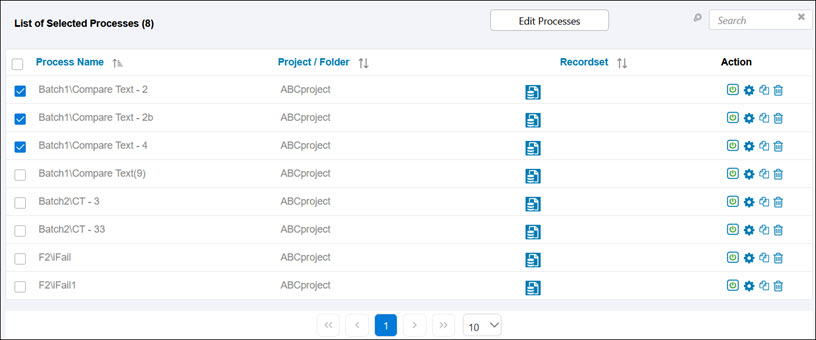
In the List of Selected Processes, select the processes you want to edit.
-
Click Edit Processes.
The Edit Processes dialog opens.

-
From the Certify Log Step Mode drop-down list, select how you want to the steps to be logged:
- No Change - No change from the Certify Log Step Mode that was specified for the Suite.
- Log All Steps - All steps are included in the log file. Depending on the size of the process, you may have memory issues. The database will grow at a large pace, and regular maintenance will be needed.
- Log Aborted Steps Only - Only aborted steps are listed in the log file.
- Log Failed Steps - Only failed steps are listed in the log file.
- Log Process Only - Only the log header and log process tables are included in the log file.
- Log Status Only - Only the log header table is included in the log file.
- Log Disabled - No logging is selected, and all the log tables are skipped
- Use the Disable/Enable toggle button to disable or enable the processes.
-
If you want to add a recordset to the processes, click the Attach Recordset
 button.
The Edit Recordset dialog opens.
-
Click Select next to the recordset you want to add.
-
Click Close.
The Edit Recordset dialog closes, and the selected layout and recordset appears in the Edit Processes dialog.
- Select an Execution Timeout option:
-
No timeout
Set no timeout for process execution.
-
Abort execution after # minute(s)
Enter the number of minutes in which to abort execution.
- Select one of the following Machine Attributes options:
-
Runs on First Available
Run suite from any available CTM Agent.
-
Enter Attributes
Use attributes to help identify which machine you want to use for execution.
-
If you selected Enter Attributes, click the Add Key/Value button.
If you selected Runs on First Available, go to Step 17.
A new attribute row opens.
-
Enter your key and value, and click the Save
 button.
 -
Repeat this add attribute process to add more attributes.
-
Click Save to save your configuration.