Creating Continuous Testing Manager Suites by Bookmark
Within the Worksoft Portal, you are able to save your favorite Certify folders and processes by creating a bookmark. You can use the bookmark to create a suite.
To create a CTM suite by bookmark, you must complete the following tasks:
- Create suite.
- Select bookmark.
- Determine how to run the suite.
- Determine when to schedule the suite to run.
- Select who receives notifications about the suite.
To create a suite:
-
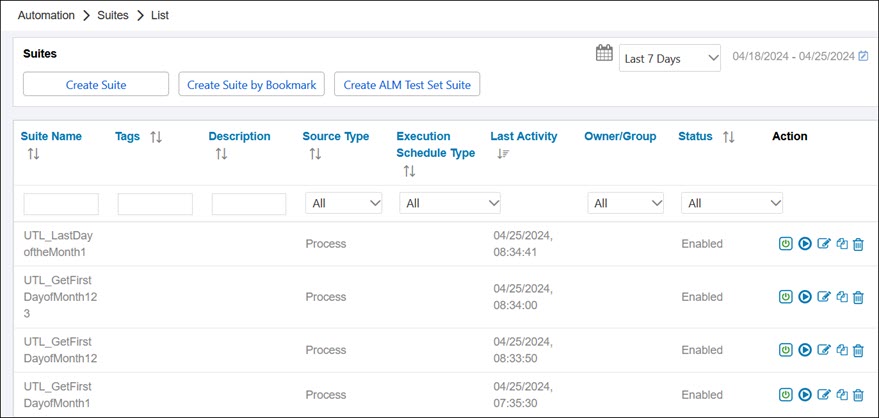
From the Continuous Testing Manager menu, click the Suites tab.
The Suites tab opens.
-
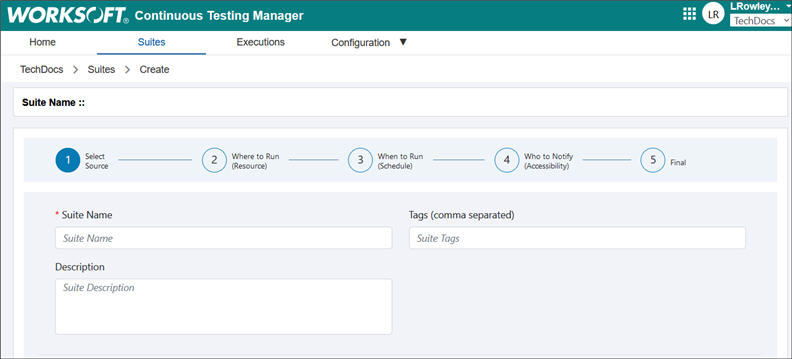
Click Create Suite by Bookmark.
The Create Suite page opens.
-
In the Suite Name field, enter a unique name for the suite.
-
In the Tags field, enter tags that will help you filter suites by tags. Separate the tags with commas.
-
(Optional) In the Description field, enter a description for the suite.
-
The suite is now created.
Next, you will select a bookmark for your suite.
To select a bookmark:
-
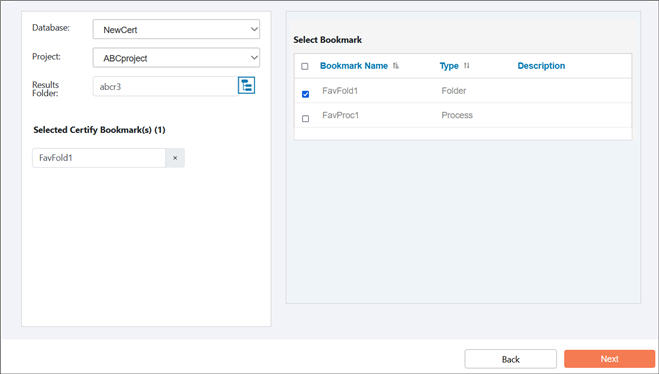
In the Create Suites page, scroll down the page to the Select Bookmark section.
-
In the Select Bookmark section, select a bookmark from the selected project.
After you selected a bookmark, the bookmarks are listed in the Select Certify Bookmark(s) section.
-
Click the Select Results Folder
 button.
The Select Results Folder dialog opens.
-
Select the folder where the results for your suite will reside in Worksoft Certify.
-
Click OK.
-
After you have selected your bookmark, click Next.
The next step is to select how to run the bookmarks.
The Database and Project fields drop-down lists are populated.
To specify how to run the suite:
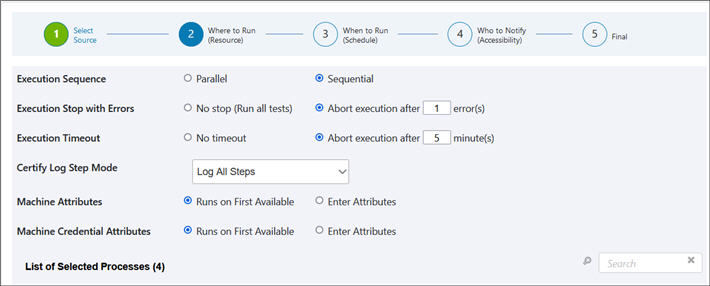
After you have clicked Next, the Execution Specification page opens.
If you need to go back to the previous page, click 1 on the Progress Bar.
-
Specify how you want to conduct your process execution:
Action
Options
Execution Sequence
-
Parallel
Run selected bookmarks at the same time.
-
Sequential
Run selected bookmarks in a specified order. If you select this option, then you must select the order of bookmark execution in the first column of the List of Selected Bookmarks section.
Execution Stop with Errors
- No stop (Run all tests)
Run all bookmarks without stopping.
-
Abort execution after # errors(s)
Abort bookmark execution after a specified number of errors.
Execution Timeout
- No timeout
Set no timeout for execution.
-
Abort execution after # minute(s)
Enter the number of minutes in which to abort execution.
Stop on Step Failure
Select this option to stop execution when a step fails.
Certify Log Step Mode
Select the mode on how you want the steps to be logged:
- Log All Steps - All steps are included in the log file. Depending on the size of the process, you may have memory issues. The database will grow at a large pace, and regular maintenance will be needed.
- Log Aborted Steps Only - Only aborted steps are listed in the log file.
- Log Failed Steps - Only failed steps are listed in the log file.
- Log Process Only - Only the log header and log process tables are included in the log file.
- Log Status Only - Only the log header table is included in the log file.
- Log Disabled - No logging is selected, and all the log tables are skipped.
Machine Attributes
- Runs on First Available
Run bookmark from any available CTM Agent.
-
Enter Attributes
Use these attributes to help identify which machine you want to use for execution. When selected, the attribute grid opens.
Click the Add Key/Value button.
Enter your key and value, and click the Save
 button.
Repeat this process to add more attributes.
Machine Credential Attributes
- Runs on First Available
Run bookmark from any available CTM Agent.
-
Enter Attributes
Use these attributes to help identify which machine you want to use for execution. When selected, the attribute grid opens.
Click the Add Key/Value button.
Enter your key and value, and click Save
.Repeat this process to add more attributes.
Result Attributes
Select one of the following options:
- No Attributes
-
Enter Attributes
If you select to enter attributes, you can define custom metadata at a suite level so the user who started the execution can be uniquely identified.
When you select this option, an attribute grid opens.
Click the Add Key/Value button. Enter your key and value, and click Save
. Both the key and value can have a maximum of 255 characters. Repeat this process to add more attributes.
Randomize Agent Selection
-
Yes
Select this option to choose agents at random instead of always selecting the first available machine.
-
No
Select this option to choose agents based on the first available machine.
-
-
Scroll down the page to the List of Selected Bookmarks table.
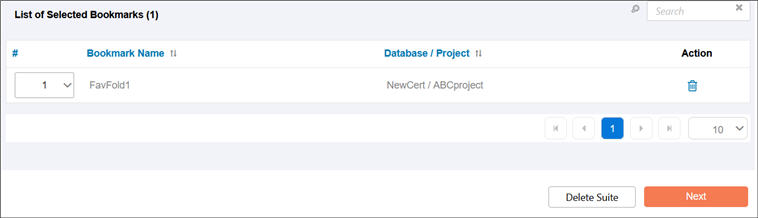
-
If you selected to run the bookmarks sequentially, select the order in which you want to run them.
-
If you want to run a bookmark in parallel to another bookmark, select the Bookmarks Run in Parallel ** option from the drop-down list.
-
Click Next.
The next step is to schedule execution of your suite.
To schedule execution of your suite:
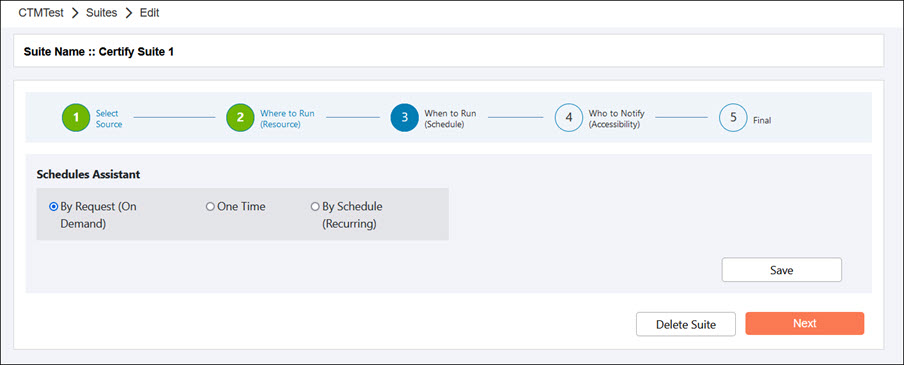
After you have clicked Next, the When to Run (Schedule) page opens.
If you need to go back to the previous page, click 1 or 2 on the Progress Bar.
-
In the Schedules Assistant section, select one of the following options:
Option
Description
By Request (On Demand)
No execution schedule is selected for the suite. You can manually execute the suite after you have completed configuration.
One Time
Schedule the suite to execute one specific time.
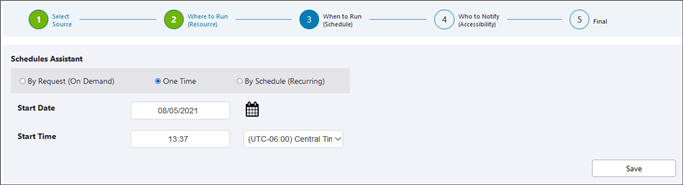
If you select this option, you must do the following steps:
- Click in the Start Date field to select a date.
- Click in the Start Time field to select a time.
- From the Time Zone drop-down list, select a time zone.
-
Click Save.
A message asks if you want to schedule suite execution at the selected time.
-
Click Yes.
By Schedule (Recurring)
Schedule the suite to execute on a specified recurring schedule.
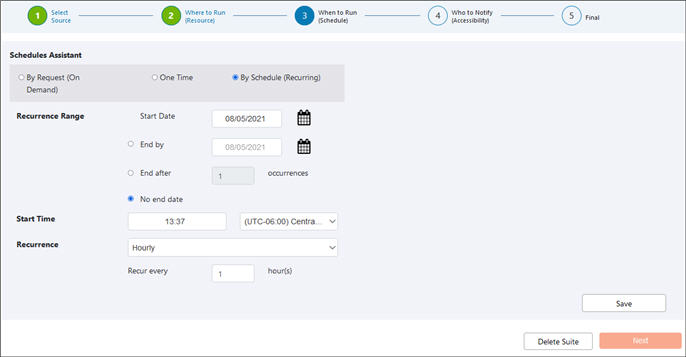
If you select this option, you must do the following steps:
- In the Recurrence Range section, click in the Start Date field to select a date.
- If you want the schedule to end by a certain date, select the End by option and click in the End by field to select a date.
- If you would rather have the schedule end after a certain amount of occurrences, select the End after option and click in the End after field and enter a number.
- Click in the Start Time field to select a time.
- From the Time Zone drop-down list, select a time zone.
- From the Recurrence drop-down list, select one of the following:
-
Hourly
Enter the amount of hours.
-
Daily
Enter the amount of days.
-
Weekly
Enter how many times you want to execute in the week. Also, select which days you want to execute the suite.
-
Monthly
Enter the day and the number of months.
-
Yearly
Enter the amount of years and select the month and day.
-
Click Save.
A message asks if you want to schedule suite execution at the selected time.
-
Click Yes.
-
Click Next.
The next step is to select who receives notifications about the suite.
To select who receives notifications about the suite:
After you have clicked Next, the Who to Notify (Accessibility) page opens.
If you need to go back to the previous page, click 1 , 2, or 3 on the Progress Bar.
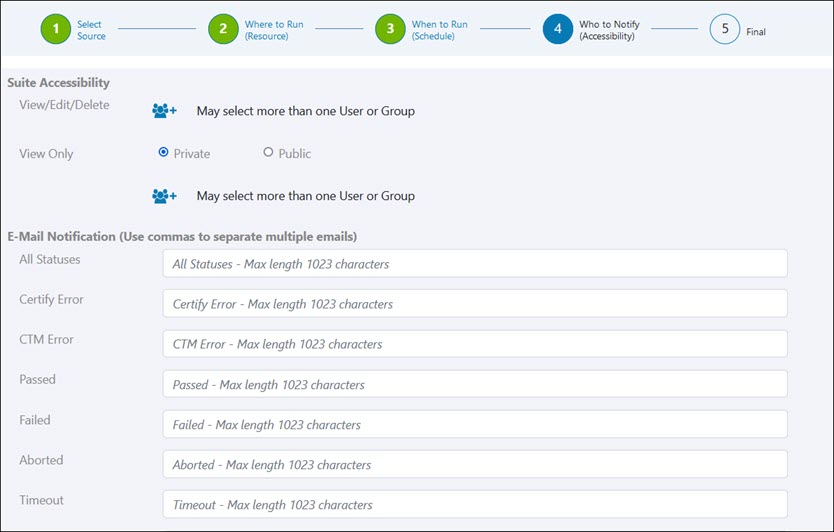
-
In the Suite Accessibility section, click the Add User/Group
 button.
The Select Users and Groups dialog opens.
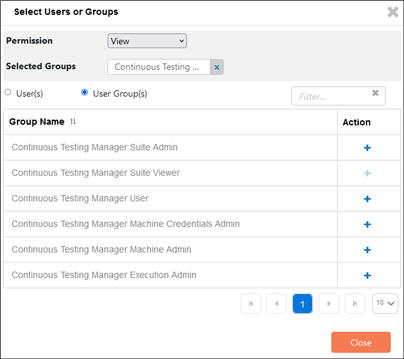
At least one user or group must be assigned permissions.
- From the Permission drop-down list, select one of the following:
- View/Edit/Delete - Users or groups have full permissions.
- View - Users or groups have only view permissions.
- Choose one of the Selected Users option:
- User(s)
-
User Group(s)
-
Click the Add
 button in the Action column next to the user or group you want to assign permissions.
The user or group is added to the Selected User or Group.
-
Repeat this process to add more users or groups with different permissions.
-
When you have completed assigning permissions, click Close.
The assigned permissions appear in the Who to Notify page.
The table lists available users or groups.
- In the View Only selection, select one of the following options:
- Private
- Public
-
In the Email Notification grid, enter the email addresses that you want notified after the suite execution is complete.
Use commas to separate multiple emails.
You can add email addresses to the following statuses:
Status
Description
All Statuses
Recipient receives email notification for all execution statuses.
Certify Error
Recipient receives email notification for all execution statuses that fail because of a Certify error.
CTM Error
Recipient receives email notification for all execution statuses that fail because of a CTM error.
Passed
Recipient receives email notification for all passed execution statuses.
Failed
Recipient receives email notification for all failed execution statuses.
Aborted
Recipient receives email notification for all aborted execution statuses.
Timeout
Recipient receives email notification for all execution statuses that timed out.
Skipped
Recipient receives email notification for all skipped execution statuses.
-
After you have added all of the email addresses, click Final.
You have completed creating your suite and the Final page opens with the suite summary.
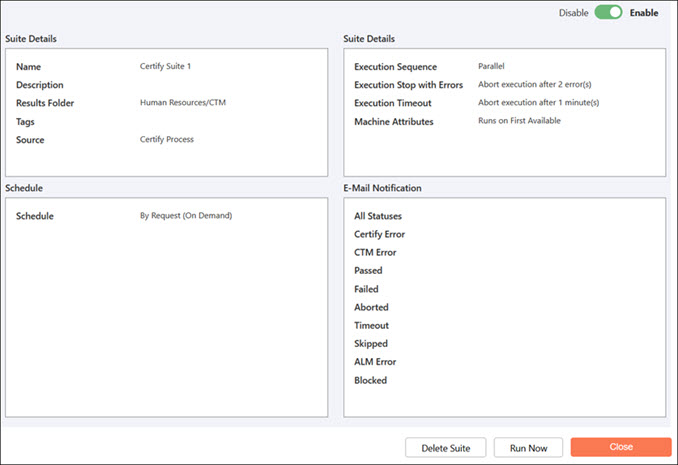
-
Click Close to complete the editing or click Run Now to run the suite.
Editing a Suite
Open the Suites tab and click one of the following buttons next to the suite that you want to edit:
|
Button |
Action |
|
|
Enable or disable the suite. |
|
|
Run the suite. |
|
|
Edit the suite. |
|
|
Delete the suite. |


