Using the Certify Results Exporter
In order to upload a Certify Results file into Worksoft Process Intelligence, you need to prepare the file first by using the Certify Results Exporter. For information on installing and configuring the Certify Results Exporter, see the Worksoft Process Intelligence Installation Guide.
To use the Certify Results Exporter:
-
Log on to the Certify Results Exporter at https://<servername>/CertifyResultsExporter.
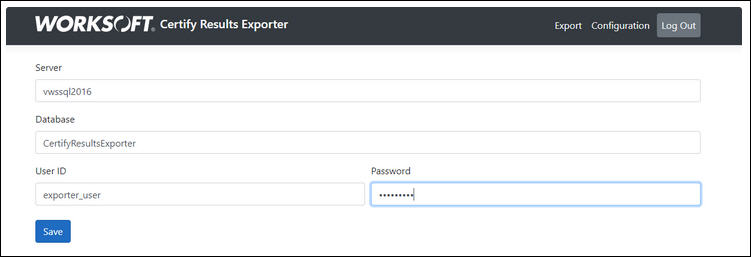
The first time Certify Results Exporter opens, you are prompted to enter the database configuration.

-
Enter the following information:
- Database server name
- Database name
- User ID
- Password
-
Click Save.
Certify Results Exporter restarts.
-
Refresh the browser page.
The Worksoft sign-in page appears.
-
Enter your credentials.
The user can not be a super user and must be assigned to at least one tenant.
After signing in, the Certify Results Exporter opens.

In order to use the Certify Results Exporter, ensure that your system meets the following requirements:
Component
Requirement
Worksoft Portal
- A Certify database must be registered in order to pull results.
- Certify Results API must be registered.
User
In order to access Certify Results API, the configured user must meet the following requirements:
- The Certify user name and password must be configured exactly the same as the user name and password listed in Worksoft Portal.
- Worksoft Portal user must have Tenant administrator role for accessing the Certify database.
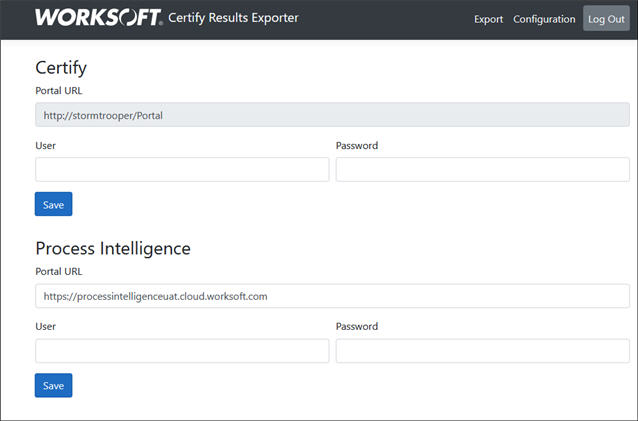
- In the Certify section, enter the following Worksoft Portal information:
- URL
- User ID
- Password
- Click Save.
- In the Process Intelligence section, enter the following information:
- URL
-
User ID
When Certify Results Captures are uploaded to Process Intelligence, this user name appears as the person uploading the Capture. This user must not be a super user.
- Password
-
Click Save.
The configuration is saved.
-
Click Export.
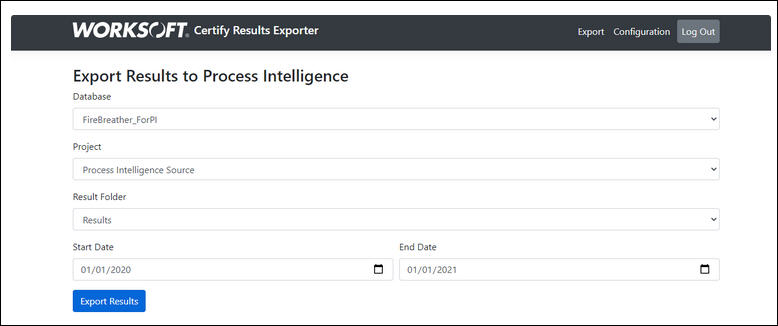
The Export Results to Process Intelligence screen appears.

-
In the Database field, enter the name of your Certify database that contains the Certify results.
-
In the Project field, enter the name of the Certify project.
-
In the Result Folder field, enter the name of the folder that contains the results.
-
In the Start Date and End Date fields, select a specific date range in order to limit the number of results.
-
Click Export Results.
A message displays indicating the number of results that were successfully exported.
-
Open Process Intelligence.
-
From the left Navigation pane, click Data Management.
The Data Management page opens.
-
Click the Certify tab.
The Certify tab opens, and all of the exported Certify Captures appear in the tab.