Saving Capture Files in the Certify Results Exporter
When using the Certify Results Exporter, you can choose to export Capture files to Process Intelligence or save the files to a Certify Results Exporter folder.
To save your Capture files to a Certify Results Exporter folder, you must first configure Certify Results Exporter in the Worksoft Portal.
To configure a storage folder for Capture files:
- Sign in to the Worksoft Portal.
-
From the Worksoft Portal menu, select Product Configuration > Certify Results Exporter.
The Certify Results Exporter Configuration page opens.
-
Scroll down the Certify Results Exporter Database Configuration page.
The Certify Results Exporter Configuration section appears.

-
If you are installing on-premise, select the Is On-premise Installation option.
-
If you want to store Capture files in the Certify Results Exporter, select the Optionally Store Capture Files in CRE option.
-
In the Capture Files Storage Path field, enter a folder path to where Capture files are saved.
The Certify Results Exporter configuration is complete.
To save Capture files to a Certify Results Exporter folder:
- Open the Certify Results Exporter in the browser at https://<servername>/CertifyResultsExporter.
-
Sign in to the Certify Results Exporter with your credentials.
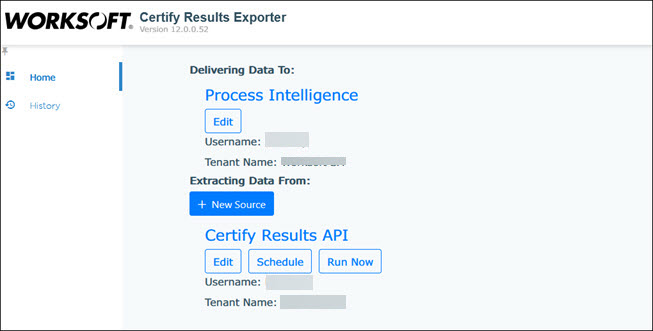
Certify Results Exporter opens.

-
Click the Schedule button under Certify Results API.
The Scheduled Exports page opens.

-
Click New Scheduled Export.
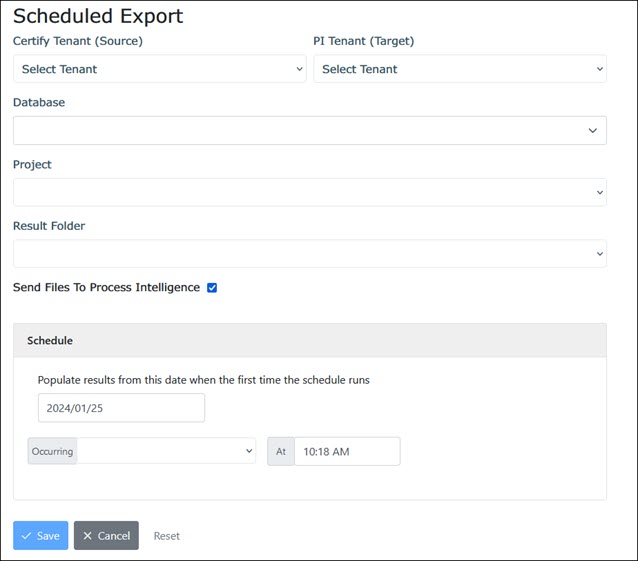
The Scheduled Export page opens.

-
From the Certify Tenant drop-down list, select the tenant for the Certify user.
-
From the PI Tenant drop-down list, select the tenant for the Process Intelligence user.
The Certify user and Process Intelligence user do not need to be in the same tenant.
-
In the Database field, enter the name of your Certify database that contains the Certify results you want to export.
-
In the Project field, enter the name of the Certify project that contains the process results.
-
In the Result Folder field, enter the name of the folder that contains the results.
-
To save Capture files to a Certify Results Exporter folder, cancel the Send Files To Process Intelligence option.
-
In the Schedule section, select one of the following options from the Occurring drop-down list and complete the configuration for that option:
Option
Configuration
Hourly
Select after how many hours and time.
Daily
Select a time.
Weekly
Select the day of the week and time.
Monthly
Select the day of the month and time.
Yearly
Select the following:
- After how many years.
- Month
- Day
- Time
Minutes
Select after how many minutes and the start time.
- In the Schedule section, select a time in which you want to export process results from the drop-down list.
-
Click Save.
The Scheduled Exports page reopens, and the scheduled export appears in the grid.

To view the Capture files, go to the Certify Results Exporter storage folder you had configured.