Configuring Zephyr in the Integration Gateway
Worksoft supports the integration with SMARTBEAR Zephyr®. Before proceeding with the configuration, verify that you have the appropriate permissions.
Accessing the Worksoft Integration Gateway
Listed below is the URL address for the Worksoft Integration Gateway:
https://<portalservername>Integration
Example: https://servername.worksoft.com/Integration
If you have any questions about your specific URL address, ask your IT administrator.
To configure Zephyr:
-
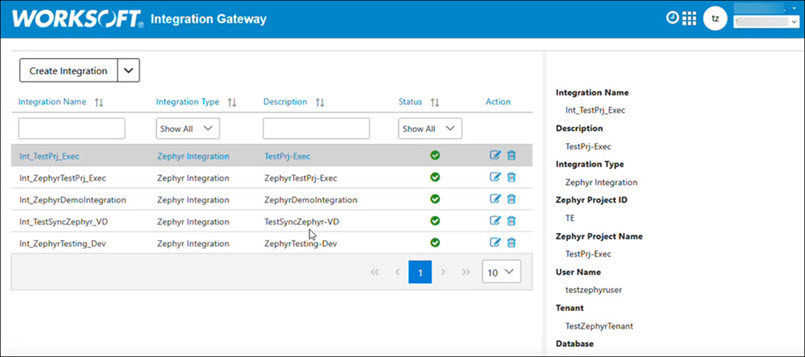
Open the Worksoft Integration Gateway.
The Integration Gateway page opens.
-
From the Create Integration drop-down list, select Zephyr Integration.
The Zephyr Integration page opens.
-
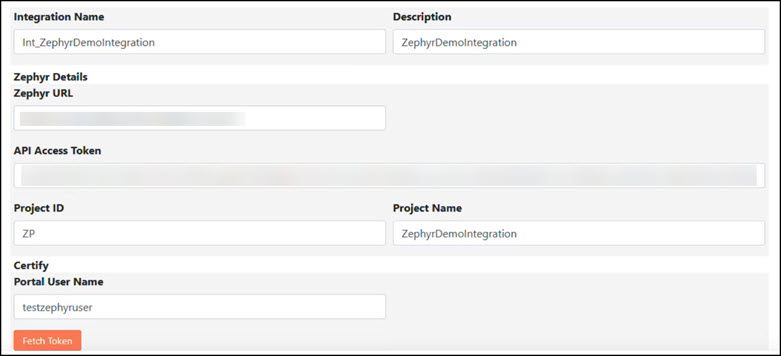
In the Integration Name field, enter a name for your integration.
-
(Optional) In the Description field, enter a description.
-
In the Zephyr Details section, enter the Zephyr API token in the API Access Token field.
For information on how to create a token, see the Zephyr Help.
-
In the Project ID field, enter the Zephyr project key.
-
In the Project Name field, enter the Zephyr project name.
This project is automatically synchronized with Certify and appears as a folder under the Certify project you specify in the Certify section.
-
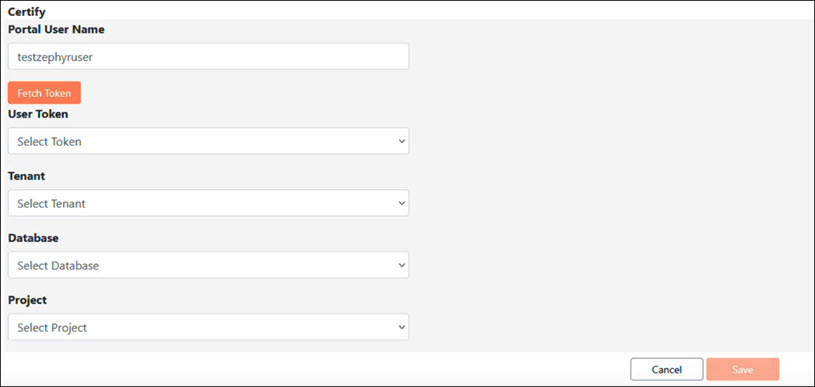
In the Certify section, enter the Worksoft Portal username in the Portal User Name field.
-
Click Fetch Token to get user tokens to populate the User Token drop-down list.
If you previously added the token in the Worksoft Portal, the system displays a message stating that it successfully retrieved the token(s).

-
Click OK.
- From the User Token drop-down list, select a token.
- From the Database drop-down list, select a database registered in the tenant.
-
From the Project drop-down list, select the project associated with the specified user, tenant, and database.
-
Click Save.
The Zephyr integration appears in the list on the Integration Gateway page.
In the Tenant drop-down list, the selected Worksoft Portal tenant is displayed by default. The tenant must have a Certify database associated with it.